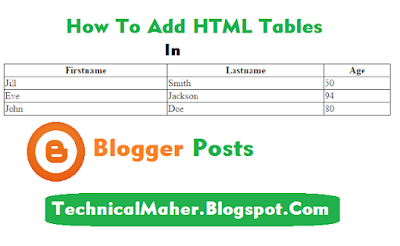
Step 1: Copy code of HTML table from below:
<style>#mytable{width:100%}#mytable, th, td { border: 1px solid black; border-collapse: collapse;}#mytable th, #mytable td { padding: 5px; text-align: left;}</style><table id="mytable"> <tr> <th>Firstname</th> <th>Lastname</th> <th>Age</th> </tr> <tr> <td>Jill</td> <td>Smith</td> <td>50</td> </tr> <tr> <td>Eve</td> <td>Jackson</td> <td>94</td> </tr> <tr> <td>John</td> <td>Doe</td> <td>80</td> </tr></table>
Step 2: Go to blogger > Posts > Edit a post Or Create a new post.
Step 3: Switch to Html view of the post editor and paste the copied code after a certain text or in the beginning of the post or after an image, where ever you want to show your HTML table in the post.
Step 4: Make changes according to your choices and publish your post to see your HTML table.
Understanding The HTML Table Code:
After adding above code for HTML Table, you need to make changes in the text and the table code and for that you need to understand the code because without it you can't add a new row in your table and can't add custom info in the rows and columns of your table. so read out below to know what the code is doing.
Here is the CSS code of your table
<style>#mytable{width:100%}#mytable, th, td { border: 1px solid black; border-collapse: collapse;}#mytable th, #mytable td { padding: 5px; text-align: left;}</style>
It gives your table the borders for each row and column and if you want, you can add your own decorations to your table for example to add a background color you need to add this:
background: yellow;
You have to add above piece of code in this part of code:
#mytable{width:100%;background: yellow;}
Now its time to make changes in the info which is added in your table's row and columns. Here is the overall code for your table:
<table id="mytable">
<tr>
<th>Firstname</th>
<th>Lastname</th>
<th>Age</th>
</tr>
<tr>
<td>Jill</td>
<td>Smith</td>
<td>50</td>
</tr>
<tr>
<td>Eve</td>
<td>Jackson</td>
<td>94</td>
</tr>
<tr>
<td>John</td>
<td>Doe</td>
<td>80</td>
</tr>
</table>
In this code blue one is the first row of your table, orange is the second, green is the third and yellow is the fourth row of your table. Now you can change text according to your choices.
To add a new row you need to add a simple piece of code below the yellow one, here is the simple piece of code that is need to be added for new row:
<tr>
<td>Jill</td>
<td>Smith</td>
<td>50</td>
</tr>
For more HTML tables visit w3schools. Or search for online HTML table generator and create one for you.
Sharing Is Caring! Share if you like :)


No comments:
Post a Comment